
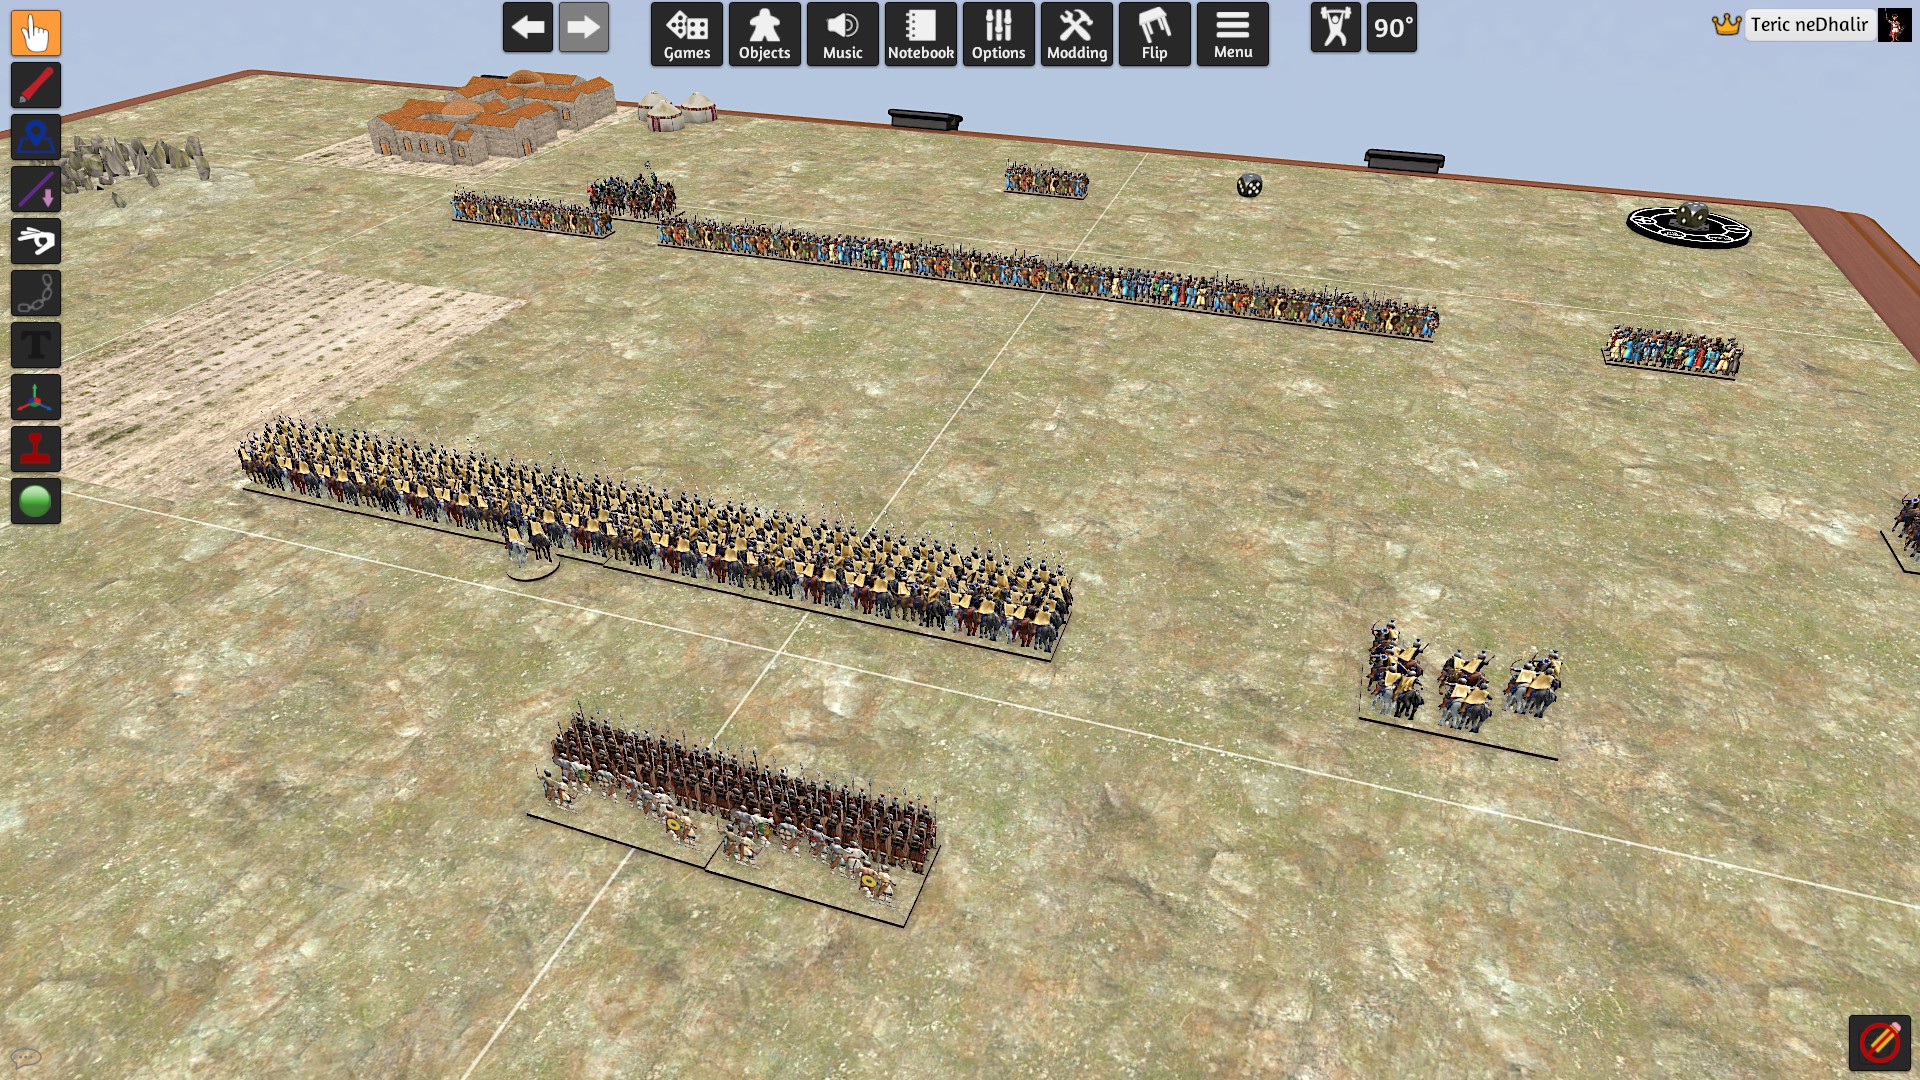
The models that I’ve made in Tabletop Simulator were originally sized for playing Impetus or To The Strongest as the big base suits the “Paperboys” format but my taste in rulesets is now moving back towards smaller stand games such as DBA/M and Triumph!. With a bit of simple scaling and re-skin of the board you can make a board suitable for Triumph! which is also a good size for DBM100 or double-size DBA. One of the aims of the Paperboys style of figures is to get a believable mass of troops on the table and I think this combination of simple rules but dense stands of figures hits the sweet spot visually that I’ve been aiming for. If you want to try it please follow these instructions:
- Download this file and save it
- Buy Tabletop Simulator 🙂
- From the Main Menu choose Create Singleplayer
- From the panel of games choose Workshop and then the green Browse button at the top
- Search for “633ad”, click on its icon and then click on the green Subscribe button which will add the mod to the list of games in your Workshop panel
- Click on the 633ad icon to start the game
- Press F8 or click on the Gizmo icon on the left hand toolbar and click on the surface of the table (a highlight should appear around the edge of the board to show you’ve selected the right object)
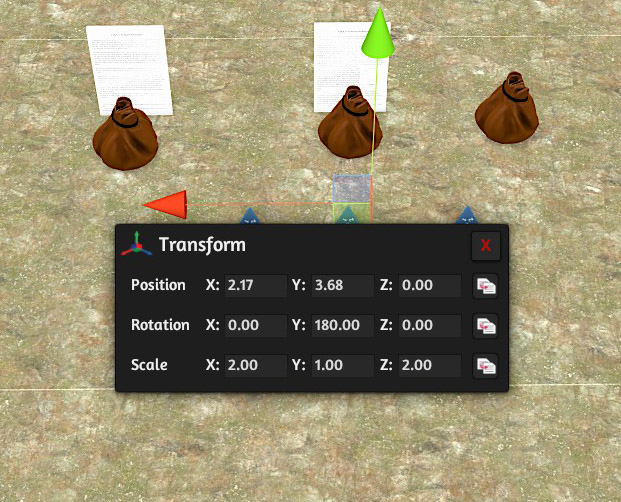
- Change the Scale X and Z values to 3.30 and the board will resize.
- The counters that are normally on the board frame will now be on the table. To move them out of the way press F1 to go back to the Grab tool and hover your cursor over the counter until you see a “0” tooltip (not “T”) and then right-click. From the Toggle menu at the top uncheck Lock. Move the counter back to the edge of the board and then Lock back in position
- For Triumph right-click on the centre of the board and choose “Custom” from the menu and change the background image to the new one downloaded from here. The board now has indications of the terrain zones and deployment area for Triumph. The grid is still set to half base width, so measurements are in MU (or for DBA 1 BW = 2 grid units)
- For DBM100 from the Options menu item at the top of the screen pick Grid and change the grid size to 3.2. That makes the grid size two-thirds of a base width so 1 grid unit = 50 paces. Leave the board background as it was as the deployment area is correct
- From the Games Menu at the top choose Save and Load and Save Game from the green button at the top. When saved the game will appear in the list with a thumbnail image. Make note of the number in the top left hand corner
- In Windows Explorer go to Documents > My Games > Tabletop Simulator > Saves. There will be a list of files called TS_Save_1.json and TS_Save_1.png etc. Find the two files with the same number as your saved game, highlight them and Copy. Go back up to the Tabletop Simulator folder and then open Mods > Workshop and paste the files there
- When you go back to Tabletop Simulator and open the Games menu your saved game will now appear in the Workshop section where it can’t be overwritten so you have a template to start each new game with
Hints and Tips
The models aren’t quite the right proportion for DBA stands, but the depths are in proportion to each other, so cavalry is deeper than medium infantry is deeper than heavy infantry and so on. If you want to make the stands the correct proportion use the F8 tool to rescale them (you can drag select several at a time). Change the Z scale to 1.33 and they should be correct. For reference the original stands are scaled at 120mm wide and 30, 40 and 60mm deep. Remember that you can save the models once edited so you only have to do it once. Right-click on the model and choose Save Object. From the Objects menu at the top choose Saved Objects and you can set up folders to organise everything.
For some troop types to get the right depth it may be better to join two stands together:
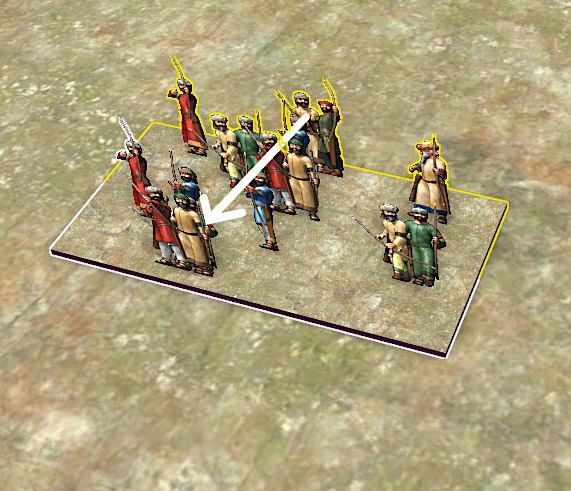
Move the two stands together (you may need to turn the lift height down – from the button at the top that looks like a weightlifter move the slider down to the bottom) then using the Combine tool (F6) drag from one stand to another until the second one is highlighted white and the first one highlighted yellow and release. You now have one object. This makes the centre of mass for rotation go a bit odd but it’s still workable.
It can be clunky moving the models about as I’ve altered the settings so that you can butt the stands against each other in a convincing way but that can make it difficult doing things like recoils. You’ll find that with some practice you can jiggle the stands about enough to force them through. You can move everything perfectly with the F8 tool and using the handles but that disables measuring movement. Rats.
Lastly watch out for rotation – the software doesn’t seem to like arbitrary rotation of things and will snap it back to the increment set at the top right of the menu buttons, so probably better to leave that on 15 degrees and do your wheels as multiples of that.
Please let me know if anything isn’t working, especially if you’re attempting multiplayer, and have fun!
